
User Manual
-
AI Dristi Device
-
Charging Dock with USB cable
-
Black Shaded Spectacles
-
2 Beacons
Inside the box you can find:
-
- Power Supply5V DCModel NoRefer Product LabelConnectivityBLEDimensions78 x 54 x 45 mmTemperature10 °C to 40 °CBattery Type (Beacon)CR2032Battery TypeLiPoPressure Altitude700 Hpa to 1000 HpaHumidity<80%Weight100 gConnectorUSB A TypeBattery Life (Beacon)4 MonthsBattery Life2-3 HoursBeacon TypeBLE
*The manufacturer reserves the right to alter the specifications of the product without any prior notification.
-
This device may be used for personal purposes in indoors only.
-
Please ensure you are providing power from a stable source.
-
Follow the maintenance advice stipulated in this instruction manual.
-
This device must only be used for the purposes described in the instruction manual.
-
This device must only be used in an ambient temperature range between 10°C and 40°C.
-
This device must always be kept in a clean, dry area. • Do not expose this device to electric shocks.
-
Do not touch the glass of the camera lens with your fingers.
-
Never drop the device.
-
Do not expose the device to sunlight or to water.
-
If an error occurs or if the device is damaged, DO NOT attempt to repair this device yourself, contact the support team.
Intended use: The device can be used by visually impaired individuals to recognize the surroundings, read a small paper or a pamphlet, navigate through in their office or home in the registered routes and recognize the people who have registered in the app.
-

-
Object Recognition (Braille “O”)
-
OCR (Reading - Braille “T” )
-
Cancel (Braille “C”)
-
Navigation (Braille “N”)
-
Power (Braille “1” is ON and Braille “0” is OFF)
-
.png)
Scan the QR for downloading the App
Device Power On and Off
-
Please turn on the power button by pushing towards Braille code 1(single dot) and turn off by pushing towards Braille code 0(three dots).
-
Please attach the device to the right leg of the shaded spectacles with camera facing upwards for the right alignment and proper functionality as shown herein the image.

-
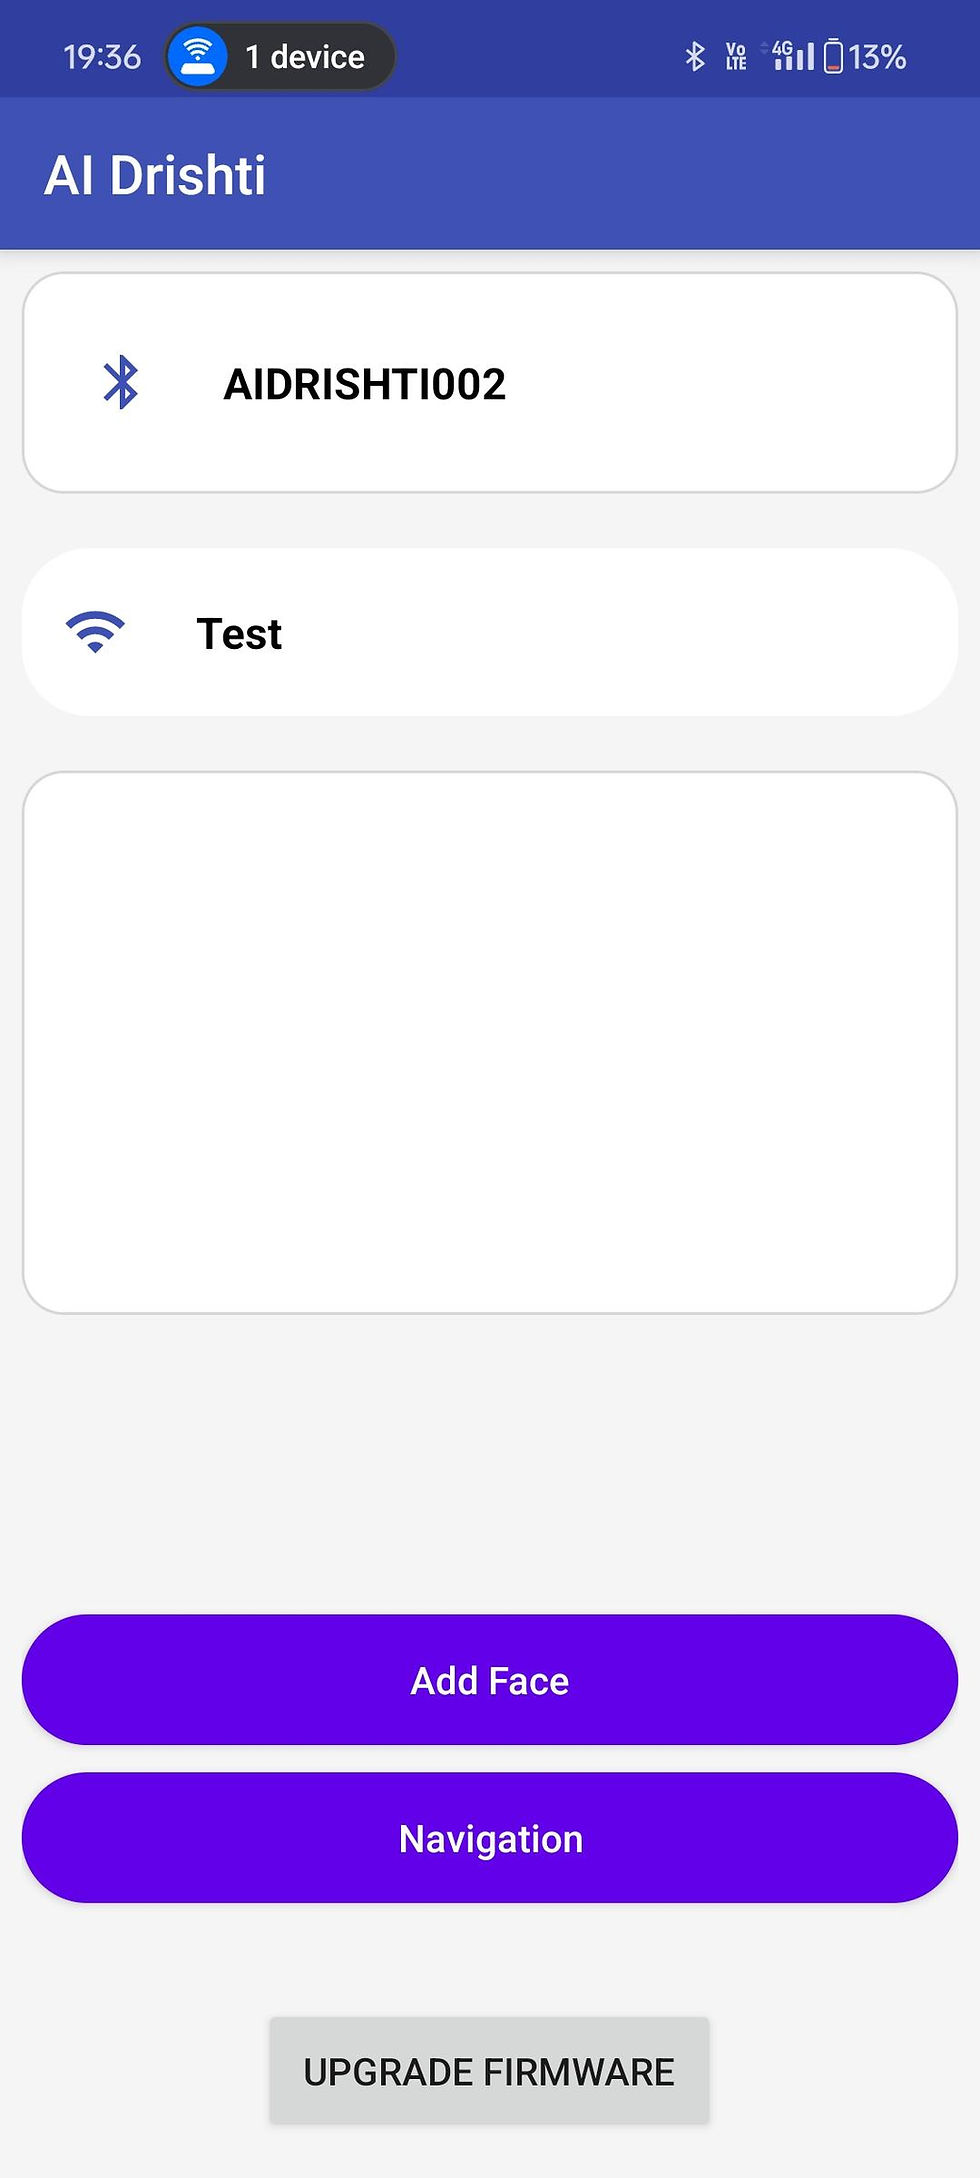
Turn on the app on the mobile. Please wait till the device “AIDRISTHII 0XXX” is connected, indicated by an announcement.
-
If the device is not automatically connected, please click the connect device button.
.jpeg)
-
The device will display the pop-up box with all the available devices. Just by clicking the device in the list you can connect to device. Before connecting to device, the device will provide a checkbox “connecting to new device”. Please press ok to continue.

-
If no device is available, the app will announce “No Dristii devices are available”.
.jpeg)
Initial Setup
This device connection announcement is followed by Wi-Fi scan by the device, displaying the list of networks.
Upon selection of the Wi-Fi-id, it will request to enter password to connect. Once the password is entered, the device will connect to Wi-Fi and announce” Wi-Fi connected successfully to Wi-Fi name”. once connected the device will restart and connect again, please wait till the device and Wi-Fi are reconnected before using again. There will be announcement about that " AI Driisti is connected " and "Wi-Fi Name" Connected successfully.
If wrong password is entered it will announce “Connection failed” and restart the process.
.jpeg)
.jpeg)
.jpeg)
From the Next Time
The device will automatically connect to Wi-Fi network with the credentials saved first time. The device will announce “Wi-Fi connected successfully to Wi-Fi name”. If the Wi-Fi network saved is not available, it will repeat the Initial Setup process. Once the device is connected it will announce that Wi-Fi is connected. After the device is connected, the device is ready for performing activity. Please ensure that the device and the mobile are connected to the same internet service. When the Device is not in use, please switch Off the device.
-
Object Recognition
Press and release first button from camera labeled Braille O (refer to Figure1) to start object recognition in front of you. If a person is detected by the device, it automatically recognizes the person if registered. If it doesn’t recognize the person, please ensure they are not having too bright background like sun light. Every time to start detection you need to click on the button.
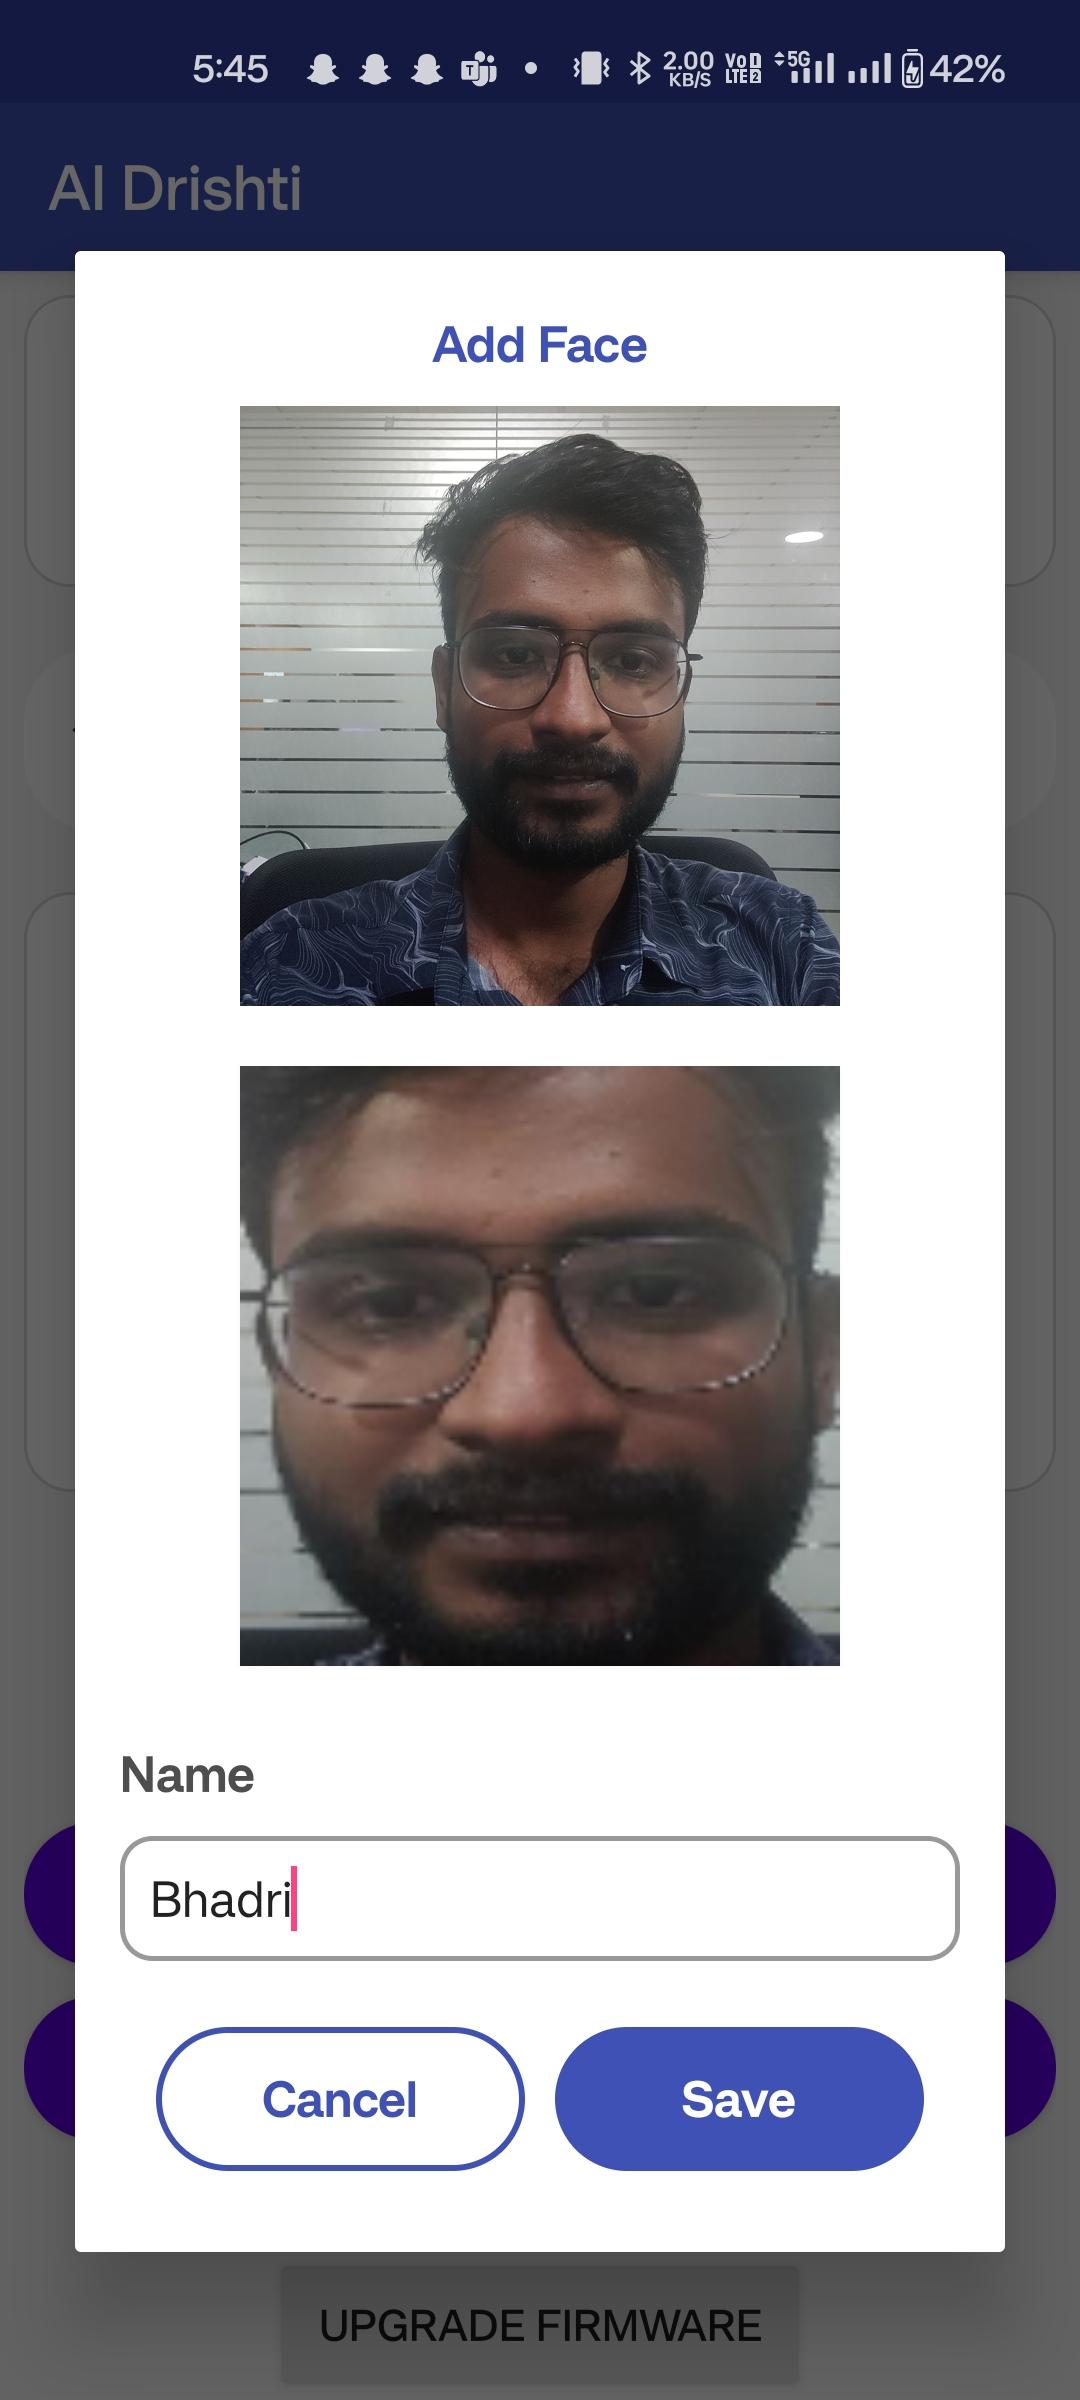
Add Face
To register the person for identification, please press the add face button on the screen. Upon pressing the button, the following screen overlay will pop up. First add your name in the name field and Kindly face towards your mobile phone front camera, once your face is clearly visible in the lower box please click on save. The face will be saved with this username.
OCR Reading
-
This app helps users to read printed text on any regular size paper.
-
To start this functionality, press and release the second button from camera labelled braille T (as shown in the figure).
-
Please hold the paper in your hands and try to direct the face and glasses towards the paper.
-
If the device can capture the complete text on page, it will announce as “Position is all right, AI Driisti is processing the text”.
-
If the device is not able to capture the complete page, then it will guide the user to move their head to capture the whole page in the image.
-
-
The user should follow the instructions and press the button again to capture. This process will continue till the page image is properly captured.
-
Once the page is captured, it will announce “Position is alright and processing the text”. After a few seconds the mobile automatically starts reading out the content.
-
The functionality will continue till the whole text is read out captured from the image. If the user wants to stop the reading in the middle, he must press “Cancel” button.
-
If the user wants to start this activity again, they have to follow the process again by pressing and releasing the same button.
-
Navigation
This app helps the user to navigate freely within indoor spaces like offices malls etc. by storing the routes once recorded by the user. This activity can be started by pressing and release of 4th button from camera labelled (Braille N).
This Navigation is designed for indoor purposes only
Add Route
Please take assistance of near and dear with proper vision while performing this activity
-
Please take one of the beacons provided to you and note down the code on the back of the beacon.
-
Please place a beacon at the start point of the route preferably stick to a wall or a table like flat surface.
-
Stand near the beacon and press the Navigation button on the app
-
This opens a new window within the app, with the following options.
-
Add Route
-
Ask Route
-
Start Route
-
Stop Route
-
Resume
-
.jpeg)
.jpeg)
.jpeg)
.jpeg)
.jpeg)
.jpg)
-
Please enter the source and destination in the text fields and press add route button. Upon pressing Add Route button the following buttons will be activated.
-
Start Route
-
Stop Route
-
-
Add Beacon pop up will appear and add the code noted down in step 1 on the mobile and press save Button. If you don’t have a beacon, please press cancel button. Upon save or cancel action the pop-up will disappear.
-
Now, please press the Start Route Button to start recording the route. Upon pressing the start route button and the button is deactivated, and you must hold the phone in hand and walk towards the destination.
-
Upon reaching the destination, please press “Stop Route” button. Now the “Add Beacon” pop up is activated, now if you have another beacon, please enter its code or click cancel. Now save it and stick it to your nearby surface. Once you hit the save/cancel button the route will be saved automatically. All the following buttons will be deactivated.
-
Start Route
-
Stop Route
-
-
Please don’t remove the beacons from that place to use the navigation for the saved route in future.
-
To check the routes saved please press Show Routes button at the bottom. Please press the back button to reach the app main window again.
Ask Route
-
For starting the navigation, please press button labelled Braille N which is 4th from the camera.
-
The device will respond with an announcement” Please ask route”.
-
Kindly ask route in this format” Source to Destination “as saved while adding the route. If the route is stored the device will start navigation else will announce the “Sorry, I could find a route that matches your command, please try again”. To start the navigation again please start from the 1st step.
-
If the user is near the beacon source, the app will start announcements with the next directions and no of steps for the user. If the user is away from the source, The device will guide the user towards the source and once he reaches the source the app will start announcements with the next directions and no of steps.
-
Once the navigation started it will continue till the destination, and it will close automatically after reaching the destination with the “you have reached your destination” announcement.
-
If user wants to stop the navigation in between they have to press cancel button.
-
If the user is not going in the expected or guided direction the app will instruct the user to go back to previous correct step and press the navigation button again to resume the navigation in the expected direction.
-
Press and release the 3rd button from the camera labelled Braille C to cancel any ongoing activity or function.
-
Please turn off the device when not in use.
-
Please charge the battery when its level is low for better performance and better life.
-
Do not expose the device to water.
-
Please remove the dust on the device and spectacles with a dry cloth without any chemicals.
Upgrade Firmware:
If there are any upgrades to the device, the user is notified by an in-app notification. User can upgrade the device by just clicking the upgrade firmware button at the bottom of the screen.
Send log:
If user needs to report any mal functionality, he/she can click the send log button to send the debug log to server. The user needs to contact the customer care to report the problem. This log helps the support team give faster resolution to the issue faced by the user.
-
Device Charging
A charging dock is provided along with the device. Please connect the dock to any USB 5V power source like cell phone charger etc. to charge the device. Please align the device with the dock and the device will automatically is attach to magnets and charging will start. Please charge for the device for at least 25 min for the complete charge. Once the device is completely charged, you can use the device for 3-4 hours continuously. The battery level of the device is indicated as soon as the device is connected to the app.
Beacon and Battery
The Beacon battery life is expected to be 4-6 months. Once the battery is exhausted the device will not be able to detect it and the navigation functionality will not work. Kindly replace the battery (CR 2032 type) as shown below.

-
My device is turned on, but it is not showing in the connect device list in app
-
Please ensure that the device is good level of charging before use.
-
Please ensure that device is not connected to any other mobile.
-
Please turn off the device and close the app and restart the process
-
Please ensure the Bluetooth and location permissions are given to your app and both are turned on in your Mobile phones
-
-
Device and Wi-fi are connected but the device is throwing error and restarting whenever I start any functionality
-
Please ensure that the device and the mobile phone are connected to same internet service
-
Please ensure the device is charged
-
Please turn off the device and close the app and restart the process
-
Please ensure your internet connectivity is available
-
-
The speech from the app is not clear.
-
Please ensure that you are using the google speech engine on your phone. To set the google speech engines go to your phone settings > Speech settings and select google engine.
-
You can set the speed of the speech to slow or fast using speech engine settings
-
-
While starting navigation the device doesn't take my speech input and start navigation
-
Please ensure that the microphone permissions are given to the app prior to using the navigation.
-
-
while using the navigation the device is not recognizing my stored routes
-
Please ensure to ask the route in the following format " From place" to " To place" in the same order as stored
-
-
I want to stop OCR reading or the navigation in the middle and start another functionality. What to do?
-
Please press the "cancel button "to stop any functionality and then press any other functionality button
-
-
I am unable to open the app in my mobile.
-
Please check if google play protect or other firewall services have blocked your app from functioning. If the problem still persists, please contact customer care
-
-
My device is not working even after charging
-
Please check whether the charging dock is connected USB 5v power source while charging. If the problem persists please contact customer care
-
-
While in navigation the landmark beacons are not getting detected
-
Please change the battery in the beacons. The expected battery life is 4 to 6 months.
-
The beacons are only detected within ten feet range from its location
-
-
My phone hot spot is not shown in the list after scanning for the Wi-Fi when connecting
-
Please ensure that your hotspot bandwidth is set to 2.4 GHz
-
-
Even after entering password the app says "Wi-Fi Connection failed"
-
The password entered might have been wrong the device will automatically scan again and recommend to enter password again.
-
-
AI Driisti is designed to assist with vision-related tasks, and while we strive for accuracy, we are not responsible for any unintended outcomes or errors during use.
Please contact the customer care or support on the following care points
Website: https://www.achalahealth.com/kfrc-driistiai
Tel no: +91-9676294545
Email: driisti@achalahealth.com
Address:
Achala health services pvt ltd.
Plot no. 342,343,
Road no 7, kakateeya hills,
Madhapur, Hyderabad - 500081,
India.

